Keurig Will Not Turn On: Four Free Checks First

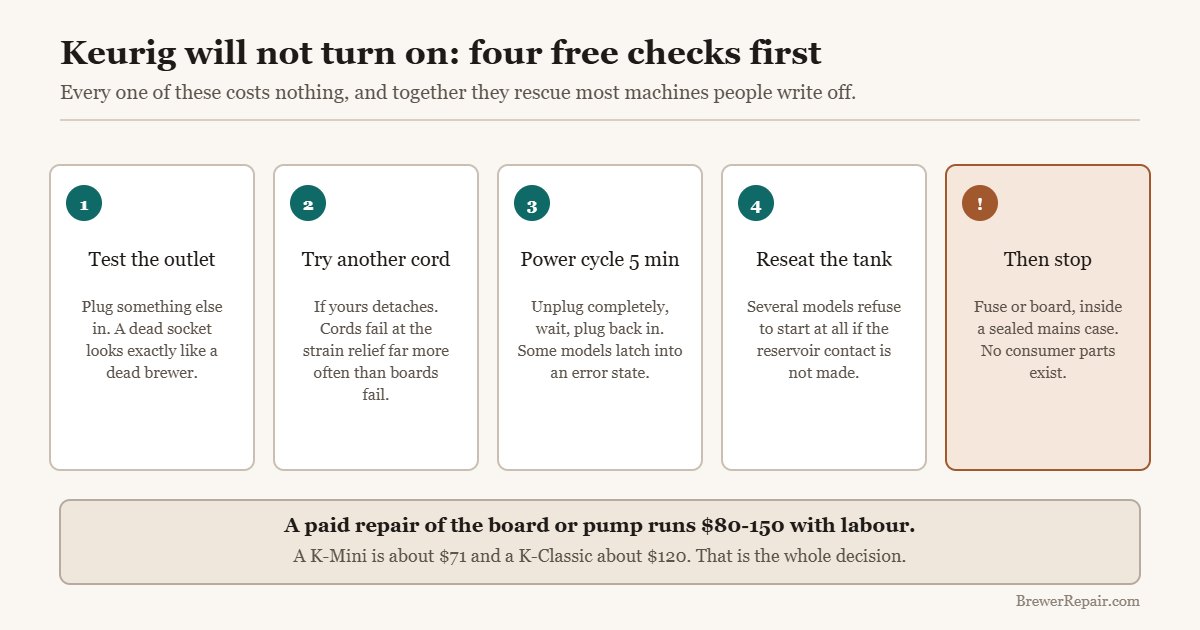
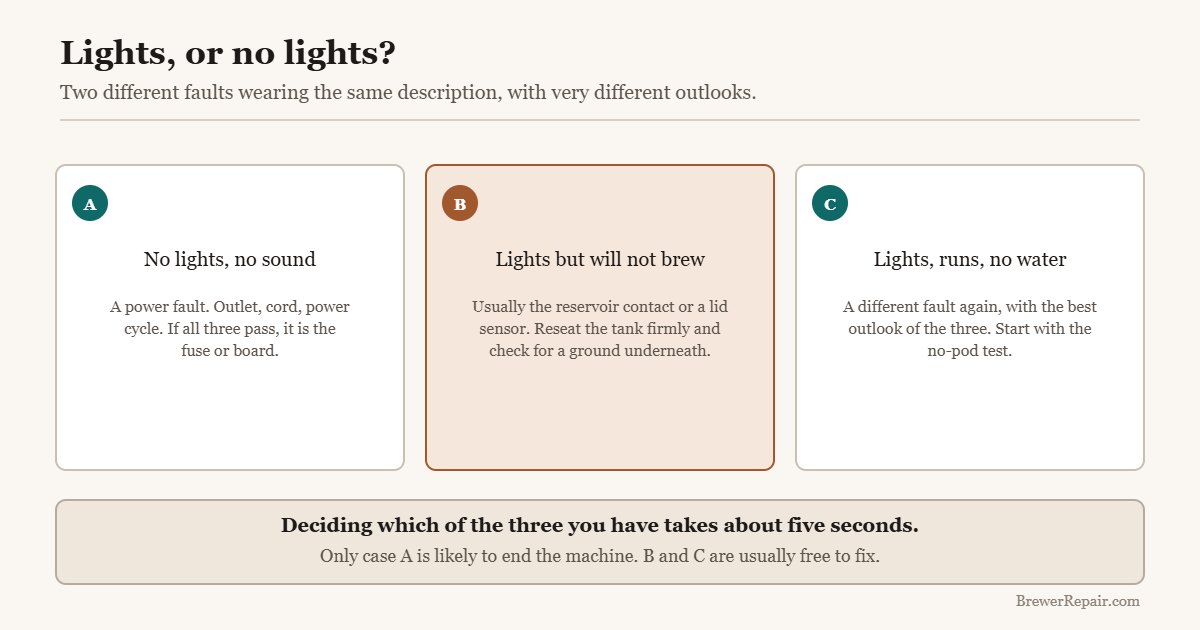
No lights at all is a power fault; lights but no brew is usually the reservoir contact. Prove the outlet, try another cord, power cycle for five minutes and reseat the tank before concluding anything.
Causes, most likely first
Work down this list in order. The first two cost nothing to check.
- Dead socket, tripped breaker or a failed extension lead
- Cord failed at the strain relief
- Controller latched into an error state after an interrupted brew or power cut
- Reservoir not seated, so the contact is not made
- Lid or pod holder sensor not registering
- Thermal fuse or control board failure - no consumer parts exist
The fix, step by step
-
Prove the outlet
Plug a lamp or charger into the same socket. A dead socket looks exactly like a dead brewer.
-
Try a different cord
Many Keurig models use a detachable kettle-style cord. They fail at the strain relief, invisibly.
-
Power cycle five minutes
Unplug at the wall and wait. Thirty seconds is not enough to clear a latched error state.
-
Reseat the reservoir
If it lights but will not brew, this is the most likely cause. Check for a ground under the tank.
-
Check the lid and pod holder
A latch sensor that is not registering leaves the machine lit and inert.
-
Then stop
Fuse and board are sealed inside a mains-connected case, and neither is sold as a part.
“Will not turn on” covers two different faults, and separating them takes about five seconds. A machine with no lights and no sound at all is a power problem. A machine that lights up but will not start a brew is not — that is usually the reservoir contact or a latched error state, and it is fixable.
Work through the free checks below before concluding anything. They cost nothing, they take two minutes, and between them they rescue most of the machines people have already decided are dead.
1. Prove the outlet
Plug a lamp or a phone charger into the same socket. This sounds patronising and it is the single most common cause of a “dead” appliance — a tripped RCD, a switched-off socket, or a failed extension lead. If the socket is dead, nothing else on this page matters.
While you are there, avoid running a Keurig through a cheap extension or a surge strip with other high-draw appliances. These machines pull a lot of current on the heating cycle, and a marginal connection shows up as a brewer that works intermittently.
2. Try a different cord
Several Keurig models use a detachable cord. Cords fail at the strain relief, where they flex against the plug body, and the failure is invisible from outside. If you have another cord with the same connector — many kettles and rice cookers use the same one — swap it and try again.
If the cord is captive, look along its length for kinks, and check where it enters the machine. Discolouration or a soft spot there means the cord, not the board.
3. Power cycle properly
Unplug the machine at the wall, leave it for five full minutes, then plug it back in. Not thirty seconds — five minutes, so the capacitors on the board discharge and the controller genuinely restarts.
Some models latch into an error state after an interrupted brew, a dry-run, or a power cut, and stay there through a normal on-off. A full power cycle clears it. This is worth doing before anything else because it costs only patience.
4. Reseat the reservoir
If the machine has lights but will not brew, this is the most likely cause. Several models will not start a cycle unless a contact in the reservoir bay is made. Lift the tank right off, refit it firmly, and check the tank is not sitting on a crumb or a coffee ground.
Same applies to the pod holder and the lid: if the lid latch sensor is not registering, the machine will sit there lit and inert.
What it is when all four fail
With a proven outlet, a known-good cord, a full power cycle and a correctly seated tank, a machine that still shows no light has an internal fault — realistically the thermal fuse or the control board.
Both sit inside a sealed, mains-connected case. Keurig does not sell either as a consumer part, and no third party makes them. That is the honest end of the road: there is nothing to order, and opening the case voids any remaining warranty while exposing mains wiring next to a water tank.
Before you write it off, check the date
Keurig’s warranty support replaces machines more readily than most people expect, and a brewer under two years old is worth a call before anything else. Have the model number from the sticker underneath and the purchase date ready.
Outside warranty, an independent repair shop that will take the job on quotes in the region of $80-150 once labour is included. Set that against a K-Mini at about $71 or a K-Classic at about $120 and the arithmetic makes itself.
So is it worth repairing?
It depends entirely on which part failed, and this fault is the one where the answer is usually no. Four other Keurig faults are genuinely worth fixing — blocked needles, an airlocked pump, a cracked reservoir and limescale — and all four are cheap or free.
The full breakdown, with the costs and the age thresholds, is in is a Keurig worth repairing. If your machine lights up but will not draw water, that is a different fault with a much better outlook — start with the no-pod test instead.
What not to do
- Do not open the base. Mains wiring, a heating element and a water tank in one sealed housing is not a place to explore.
- Do not keep pressing the button. If the machine is latched into an error state, repeated presses do nothing; if it is drawing current somewhere it should not, they make it worse.
- Do not order a “Keurig power board” from a marketplace listing. They are pulled from scrap machines, rarely match your revision, and there is no way to verify the fault was the board in the first place.
If you are replacing it
Buy for the fault you had. A machine that died of scale wants a removable reservoir and a filter holder so descaling is easy. A machine that died of a cracked tank is an argument for a fixed-tank compact model. And if you only ever brewed one cup size, the cheaper machines do that identically — the price difference across the range is reservoir size and programming, not the coffee.
Replacement machines worth considering
If the four checks came back empty, these are the machines to look at — chosen for the fault you just had rather than for features.

Keurig K-Mini Single Serve K-Cup Pod Coffee Maker, 6 to 12oz Brew size, with Cord Storage, Perfect for Small Spaces, Black


Keurig K-Classic Single Serve K-Cup Pod Coffee Maker, with 3 Brew Sizes, 48oz Removable Reservoir, Black
Questions people ask about this fix
My Keurig has no lights at all. Is it dead?
Not until you have proved the outlet with another appliance, tried a different cord, and unplugged it for five full minutes. If all three fail, it is the fuse or the board and there is nothing to order.
It lights up but will not brew. Is that the same fault?
No, and the outlook is much better. That is usually the reservoir contact or a latch sensor. Reseat the tank firmly and check nothing is under it.
Can I replace a Keurig control board?
Not realistically. Keurig does not sell them, marketplace boards are pulled from scrap and rarely match your revision, and opening a sealed mains case next to a water tank is not a home job.
How long should I unplug it for?
Five minutes. Shorter does not fully discharge the board, which is the whole point of the exercise.
Is a paid repair worth it?
Rarely. Shops quote $80-150 with labour, against a K-Mini at about $71 and a K-Classic at about $120.
Other Keurig problems
Keurig Coffee Tastes Burnt or Bitter: What Causes It
Burnt and bitter are different complaints with different causes, and the plastic in a Keurig holds onto old coffee oil in a way people underestimate.
Clogged Keurig: Needle, Water Line or Scale
Three different blockages produce the same symptom. Which one you have decides whether the fix is two minutes with a paper clip or a full descale.
Keurig Leaking Water From the Bottom: Find the Source First
Water under a Keurig comes from four places and only one of them needs a part. The paper towel test tells you which before you spend anything.